Description
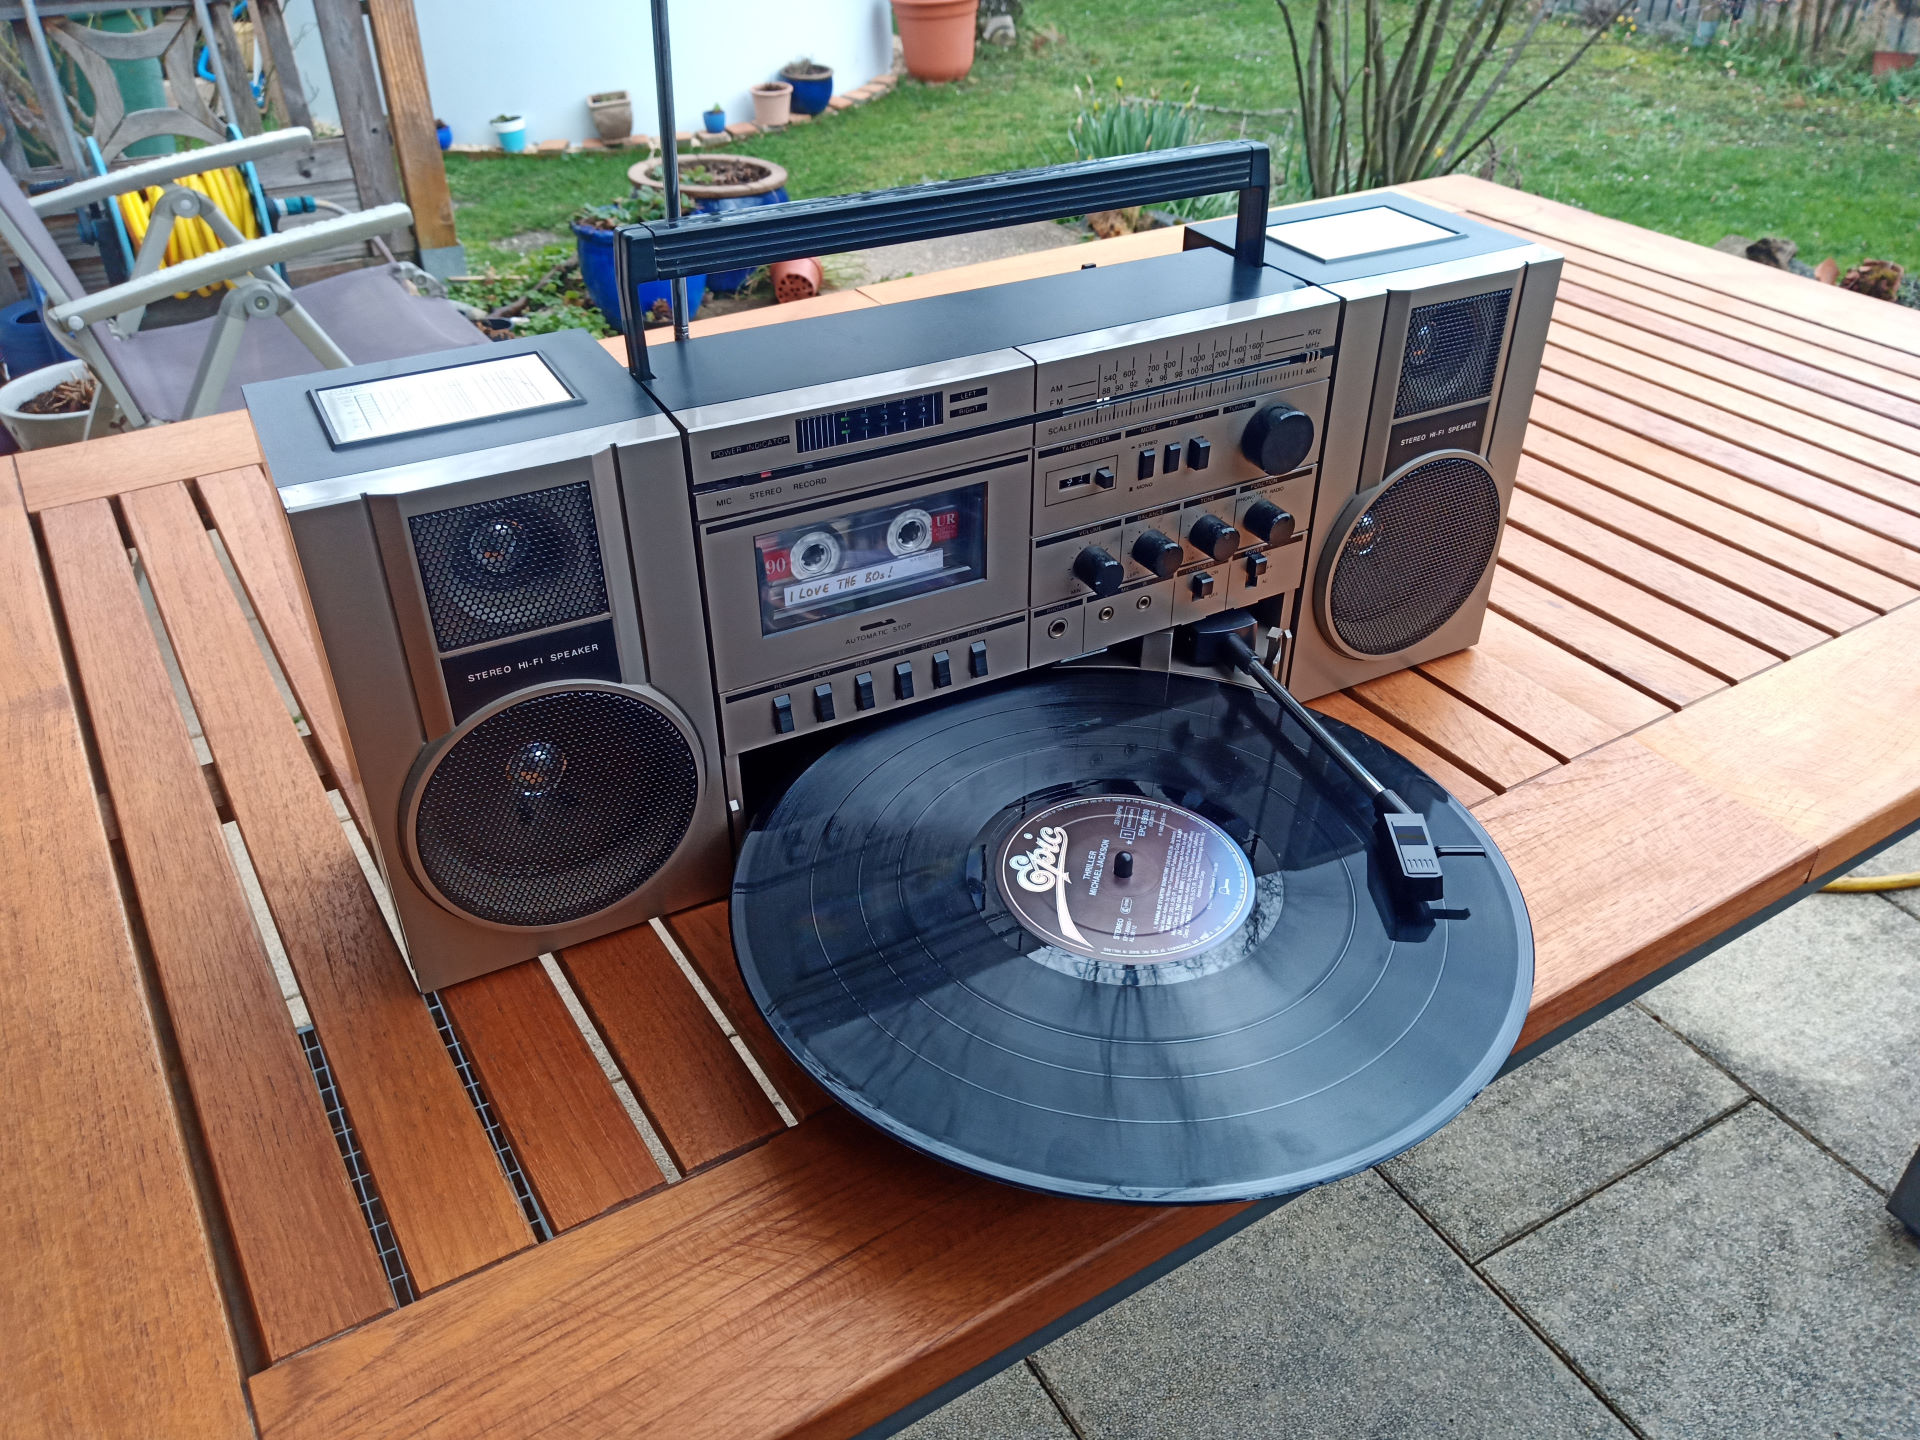
If you still own a cassette deck or a turntable you might encounter the problems with wobbling sound, cassettes not ejecting and various other functional defects. We know that from ourselves: everything that moves will get some little aches and pains over the years.And when I recently wrote about the Havauxes STPR 4000 ghetto blaster in the blog, I thought I might describe once how one maintains and restores such old HiFi technics.
Lovers of vintage Hifi and especially owners of a STPR 4000 (or the identical Randix HG-40P) might look forward to a pictured maintenance manual...
⚠Beforehand: Generally never work on devices which are connected to mains supply!
An electric shock can be lethal - even in form of long-term consequences. Who experiences an electric shock, even if supposedly minor, should see a doctor.
Thus: Remove mains supply cord before any other activity.
What you'll need
- Screwdriver
- Sewing machine oil
- Brush, Q-tips
- Tweetzers, maybe
- Replacement belts for turntable and cassette deck (see below)
Disassembly
Opening the case
- Unplug mains supply cable and remove batteries on the back side of the case.
- Unplug speaker cables and detach speakers.
- The front is hold with seven screws (one located inside the battery tray). Remove them using a long screwdriver.
- Now the front and back side case parts can be pulled apart a bit. The antenna cable still limits this, so we unscrew it as well.
Both case halves still are connected with some cables, but this won't impair the further work.
When it comes to dust and dirt, inside old electrical devices it looks like in old attics. Anyone who owns a compressor can thoroughly blow all the dirt out of the case here. But it might be preferable not to do this in closed rooms ...
Turntable
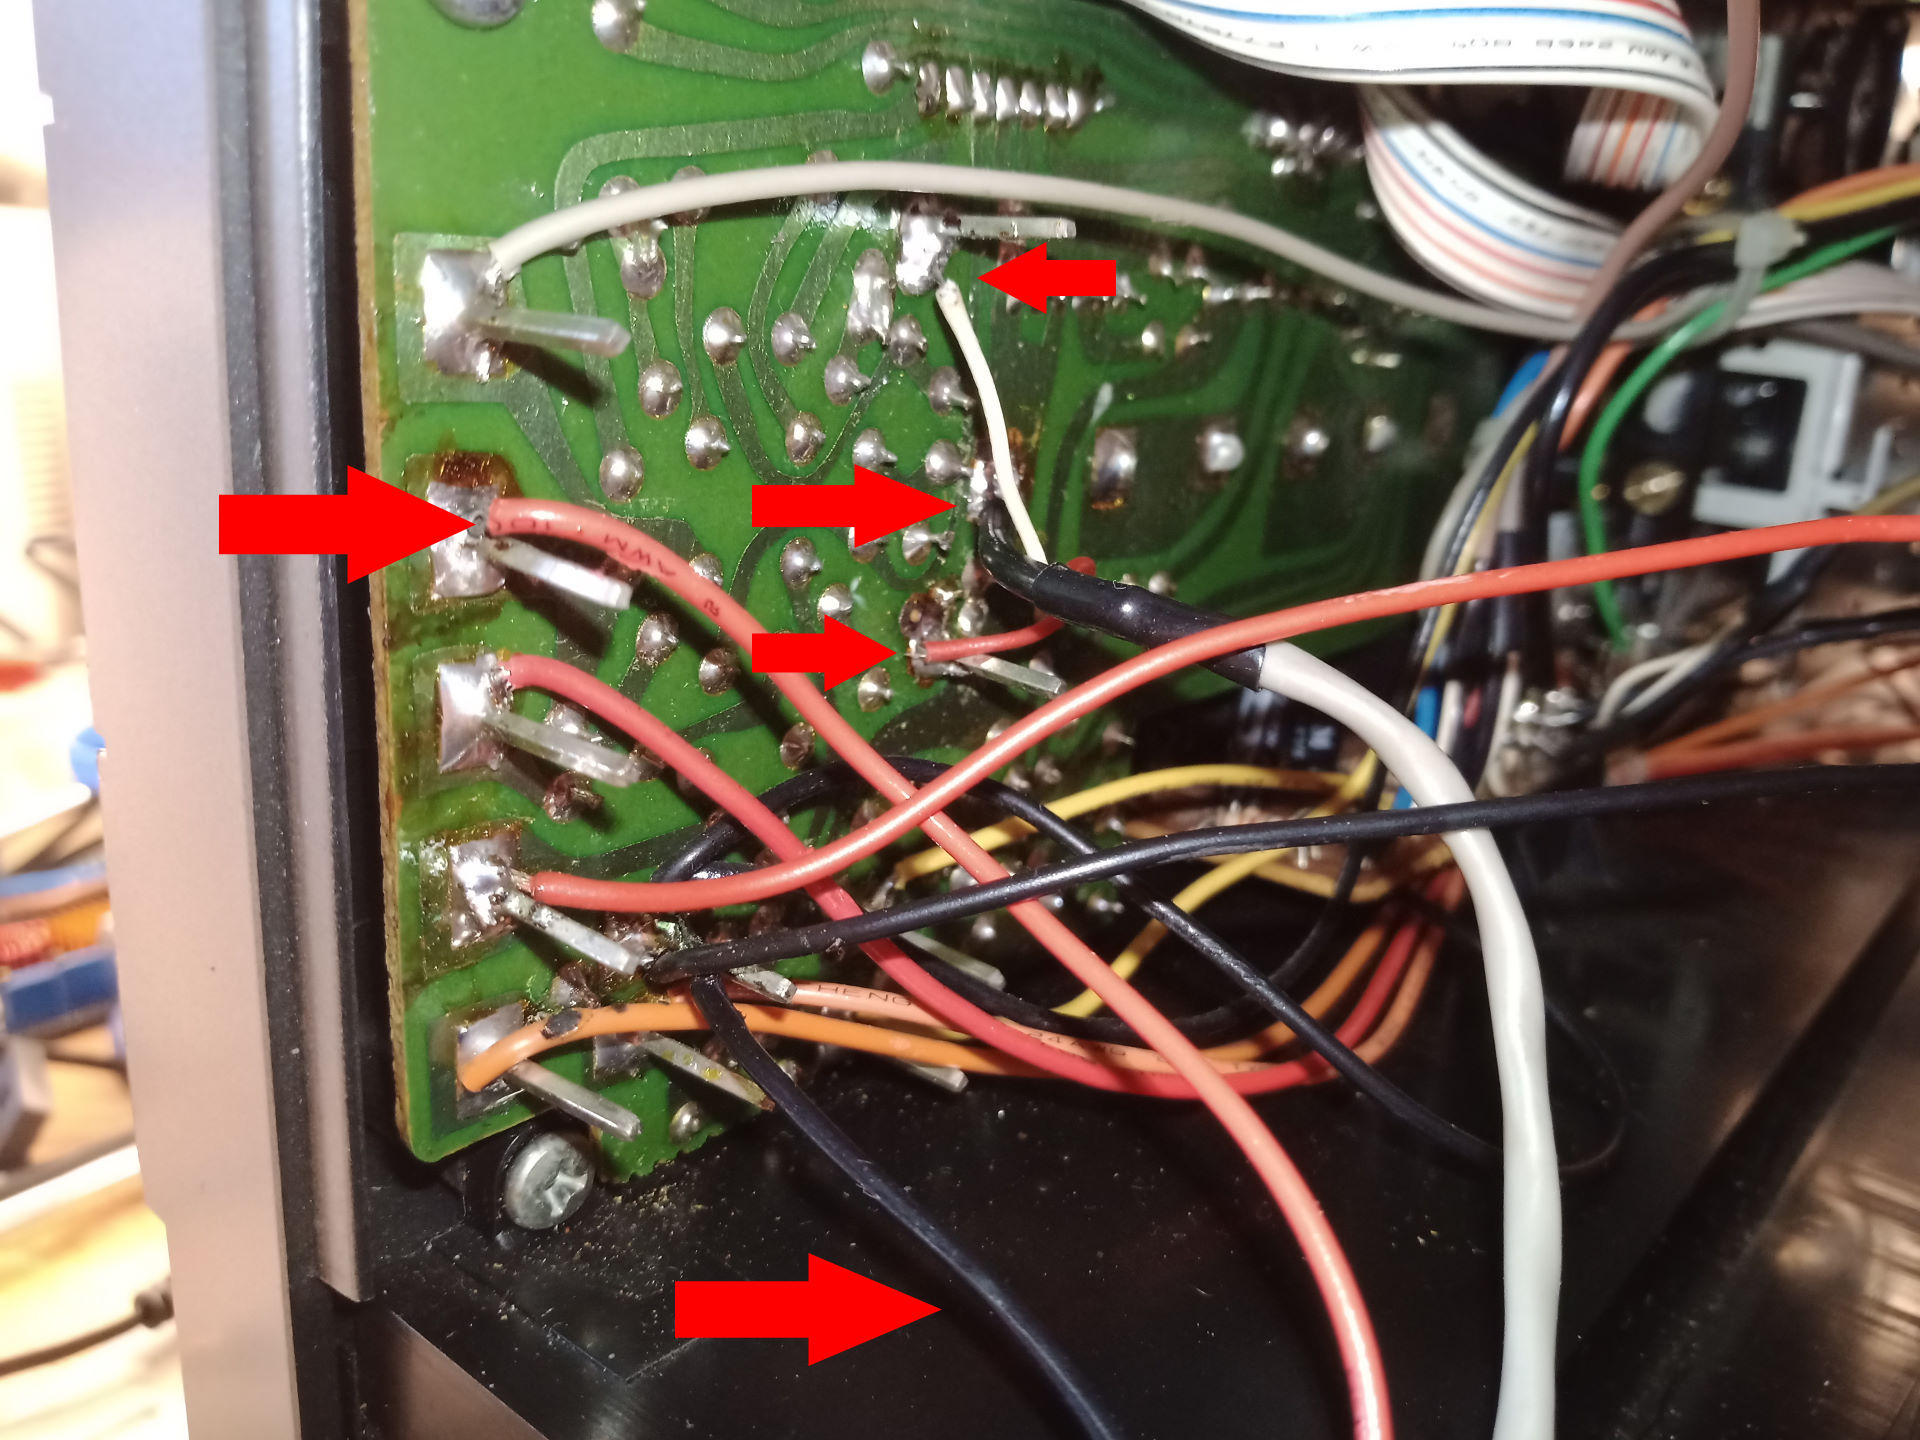
Since we want to replace the turntable belts, we cannot avoid to dismount it.- Unsolder the turntable cables from the lower circuit board:

There a five locations to unsolder - The turntable tray is connected with seven screws from the inside of the front. Remove these.
- Pull out the turntable from under the cables between the case halves.
- At the bottom side of the turntable tray there are two screws (marked yellow in the picture). One is the center of rotation when swiveling the turntable, the other one limits the opening angle. Remove these screws:
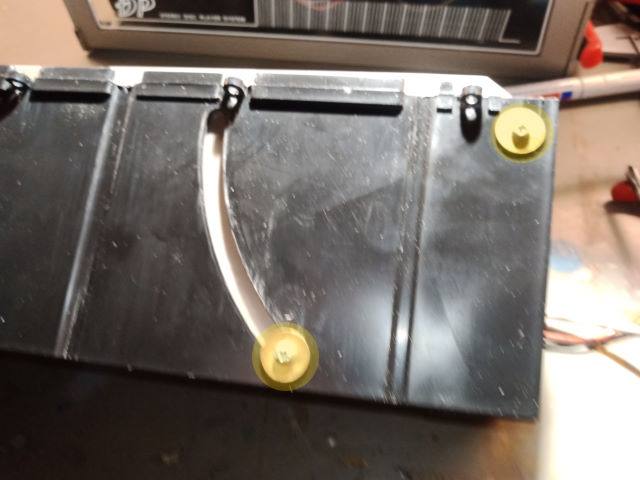
Bottom side of the tray - Carefully remove the turntable from its tray.
- There are some screws at the bottom side of the turntable unit. Only the four screws which are deeper countersunk must be removed to separate upper and lower halves og the turntable unit.

Also the turntable case halves are still connected with cables, but this won't impair us. Make sure not to tear the thin cables of the tone arm apart!
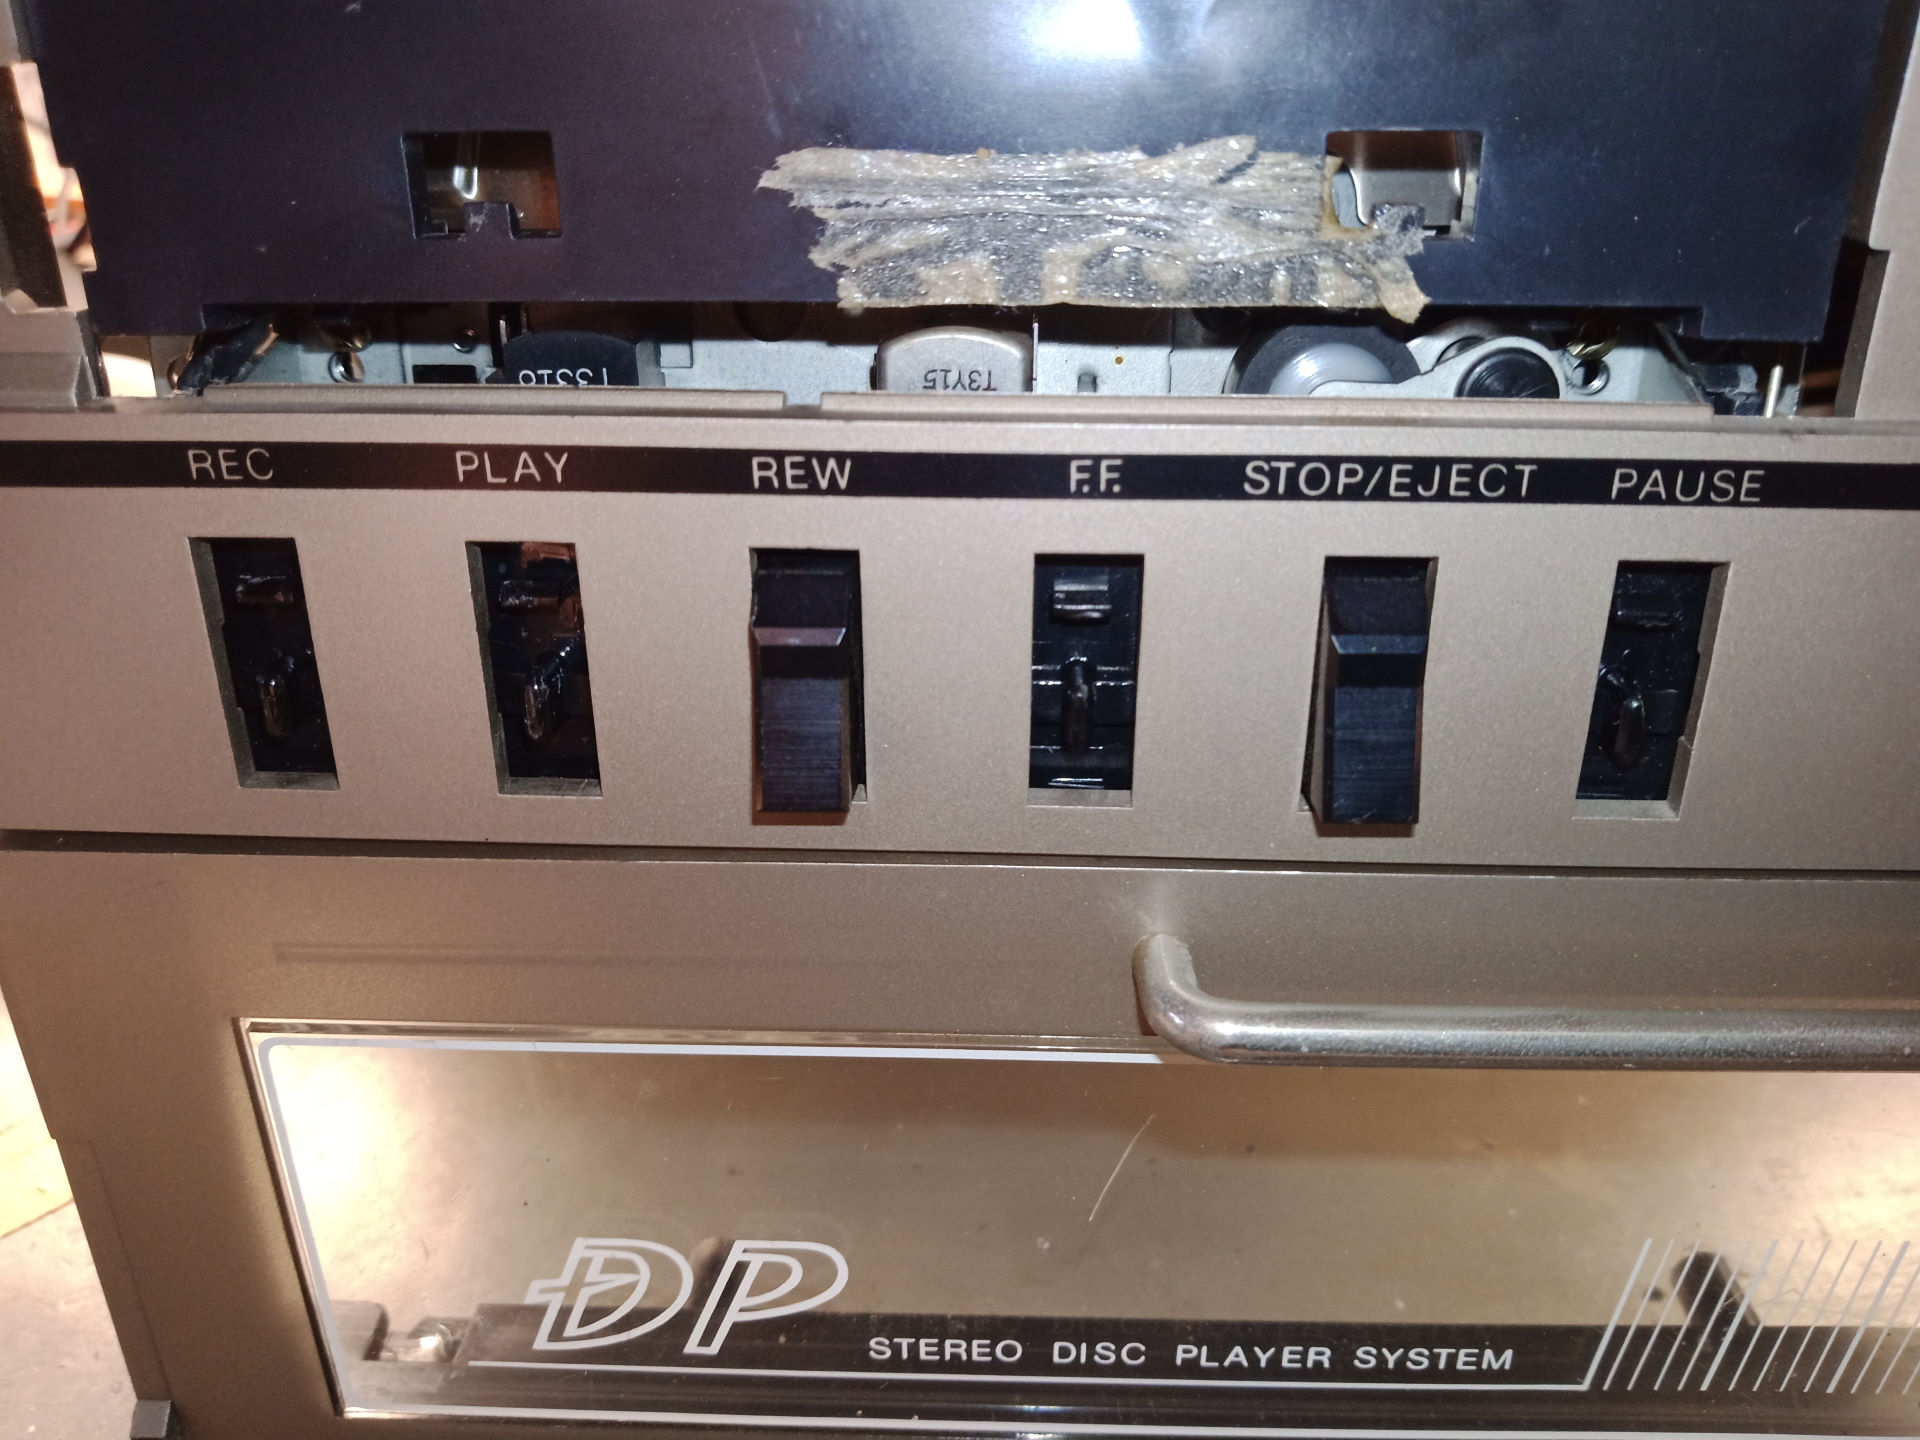
Cassette drive
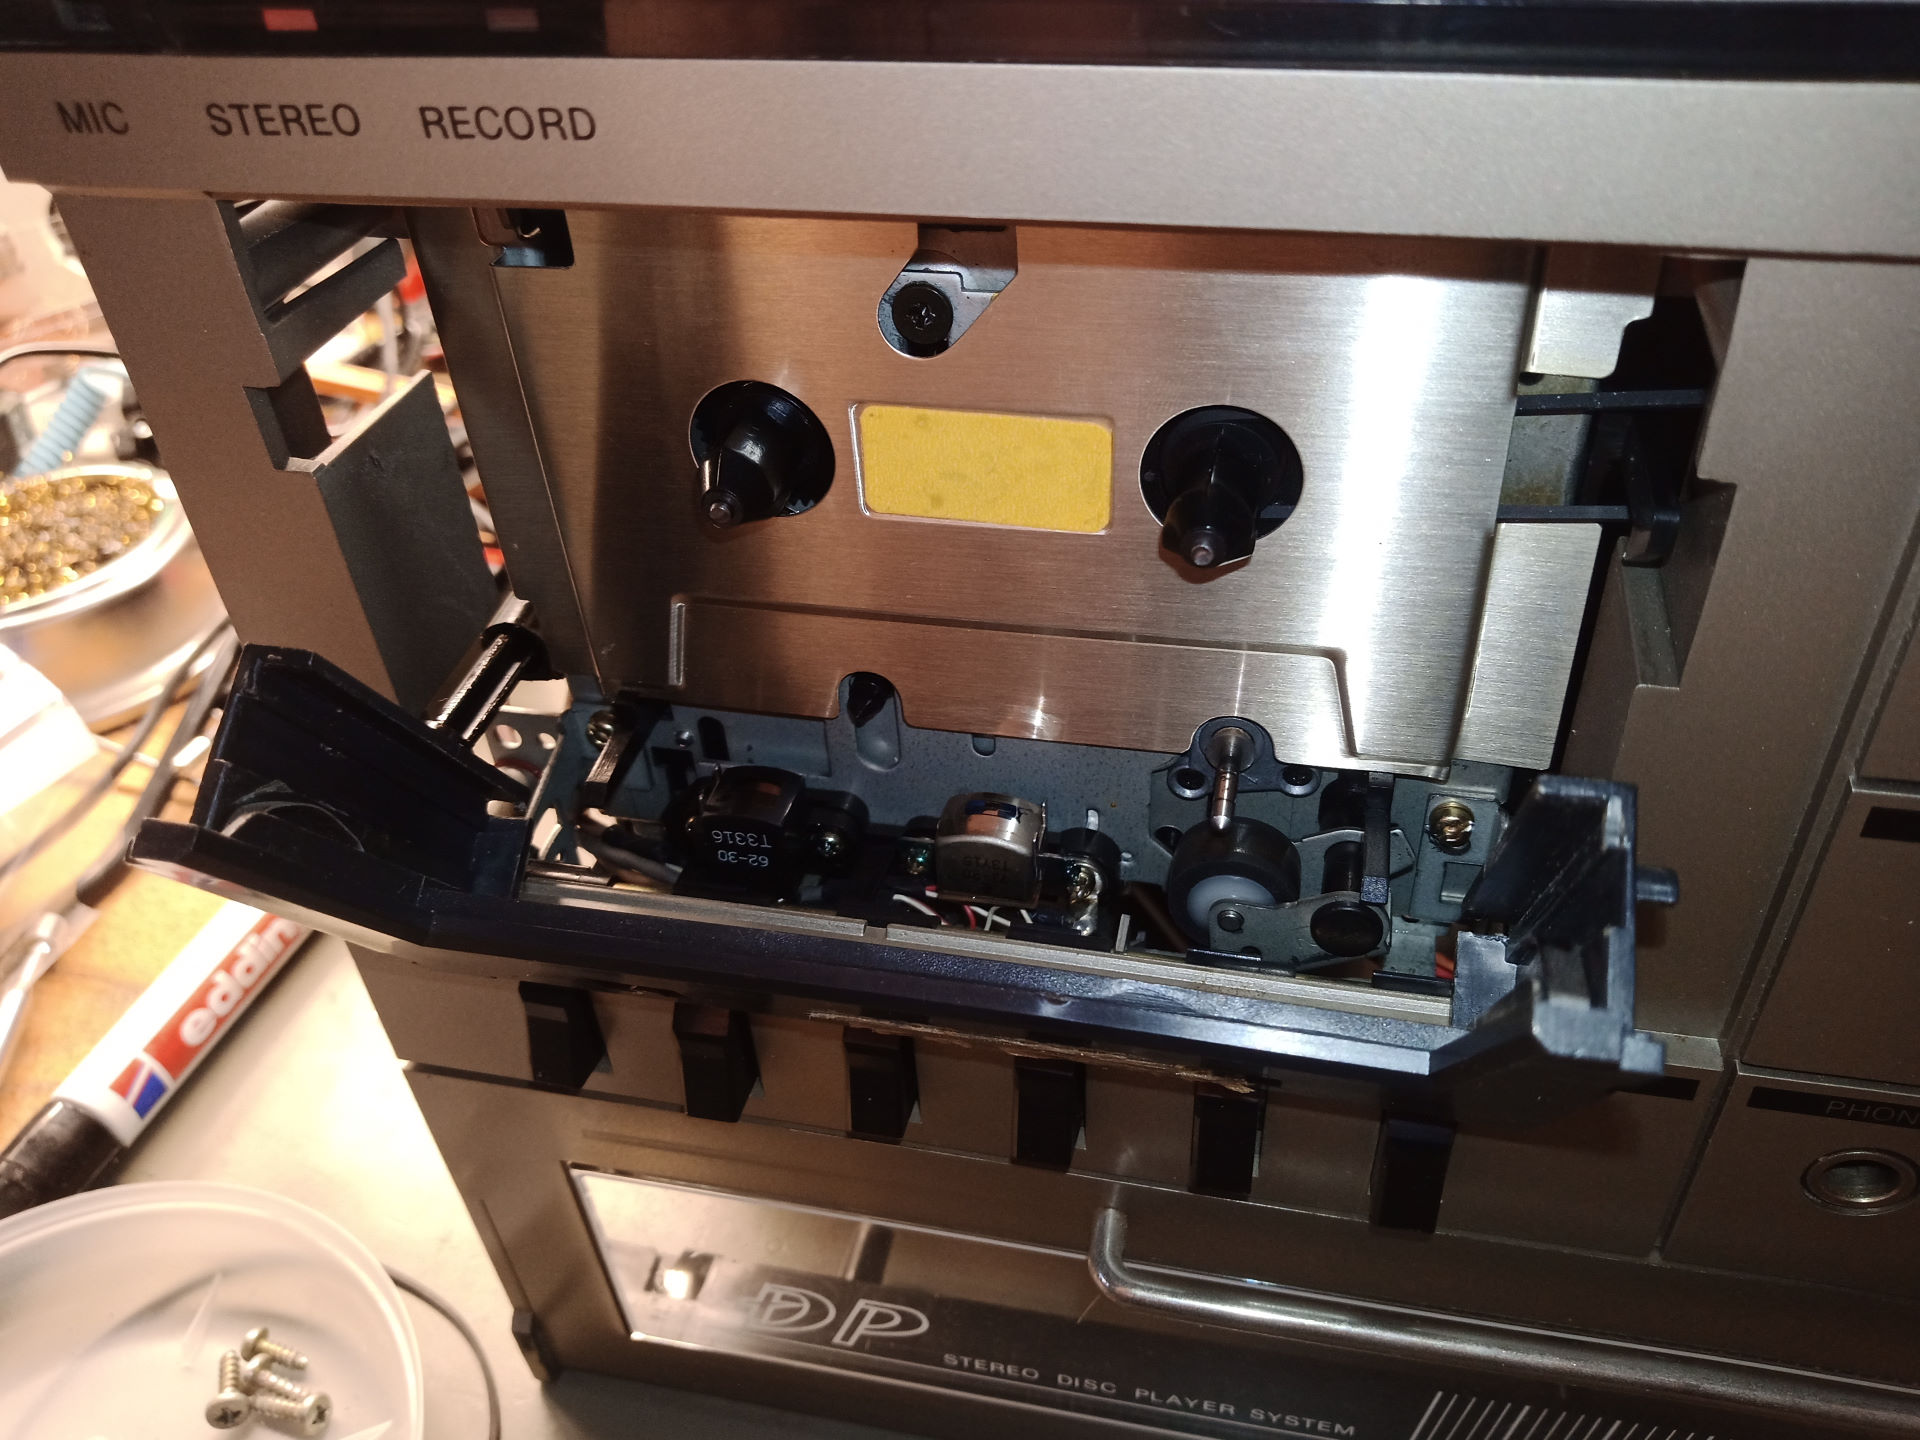
We put the dismantled turntable aside and continue with the cassette drive. The cassette drive also can be detached, although it may be a bit fiddly.- When the drive is open, the front glass can be pulled up and out:

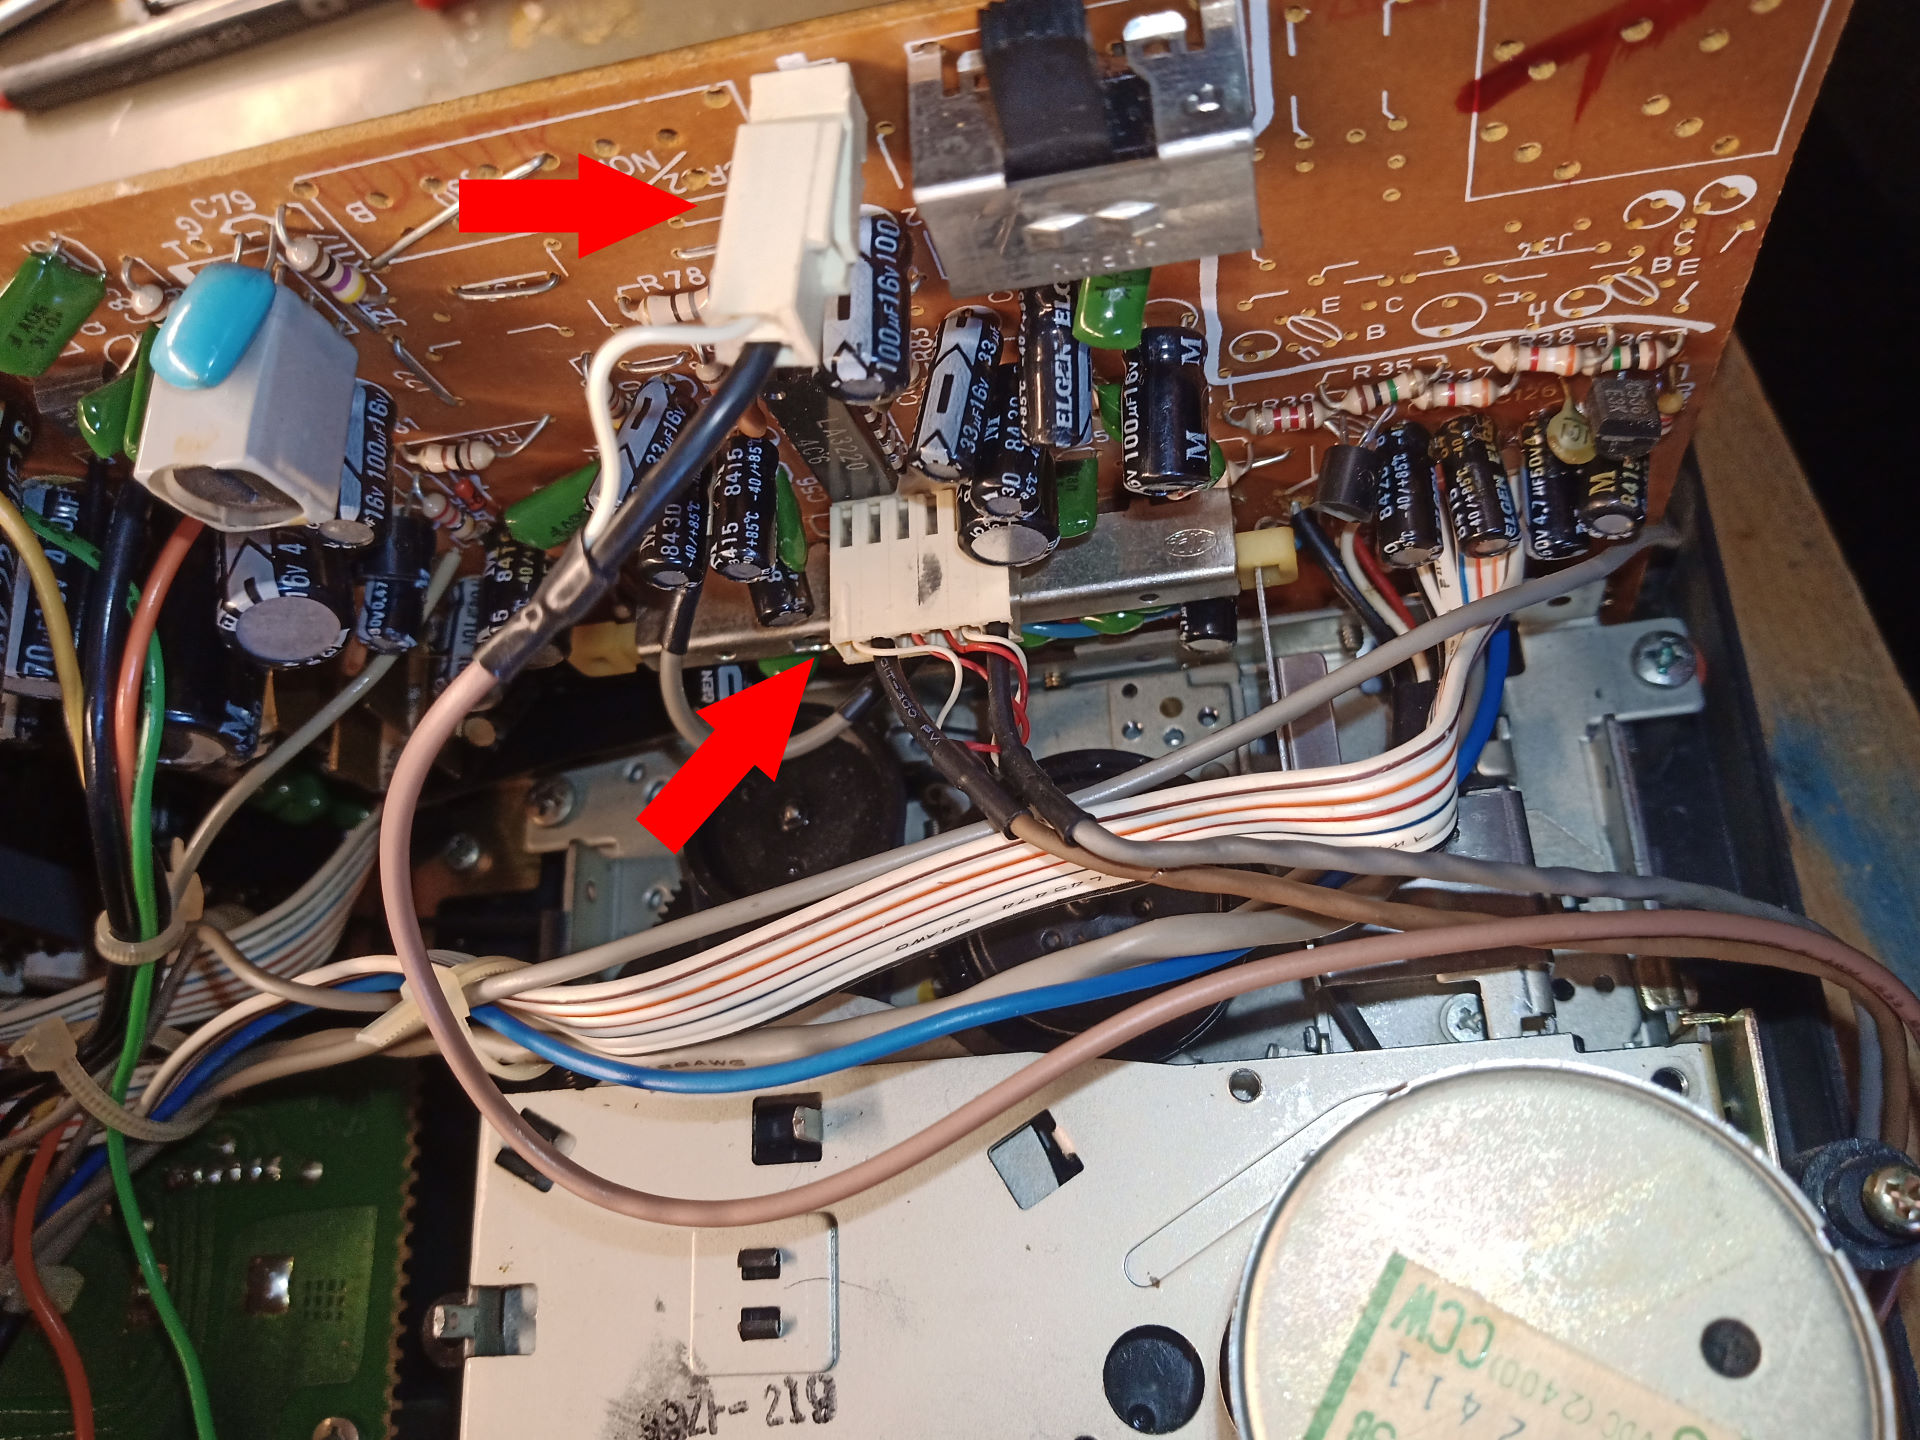
This is how it should look like. - Unplug these two plugs of the cassette drive so that we get a little more space:

The plugs are reverse polarity protected; you don't have to remember which way they were. - The cartridge drive is held in place with five screws. Remove these:
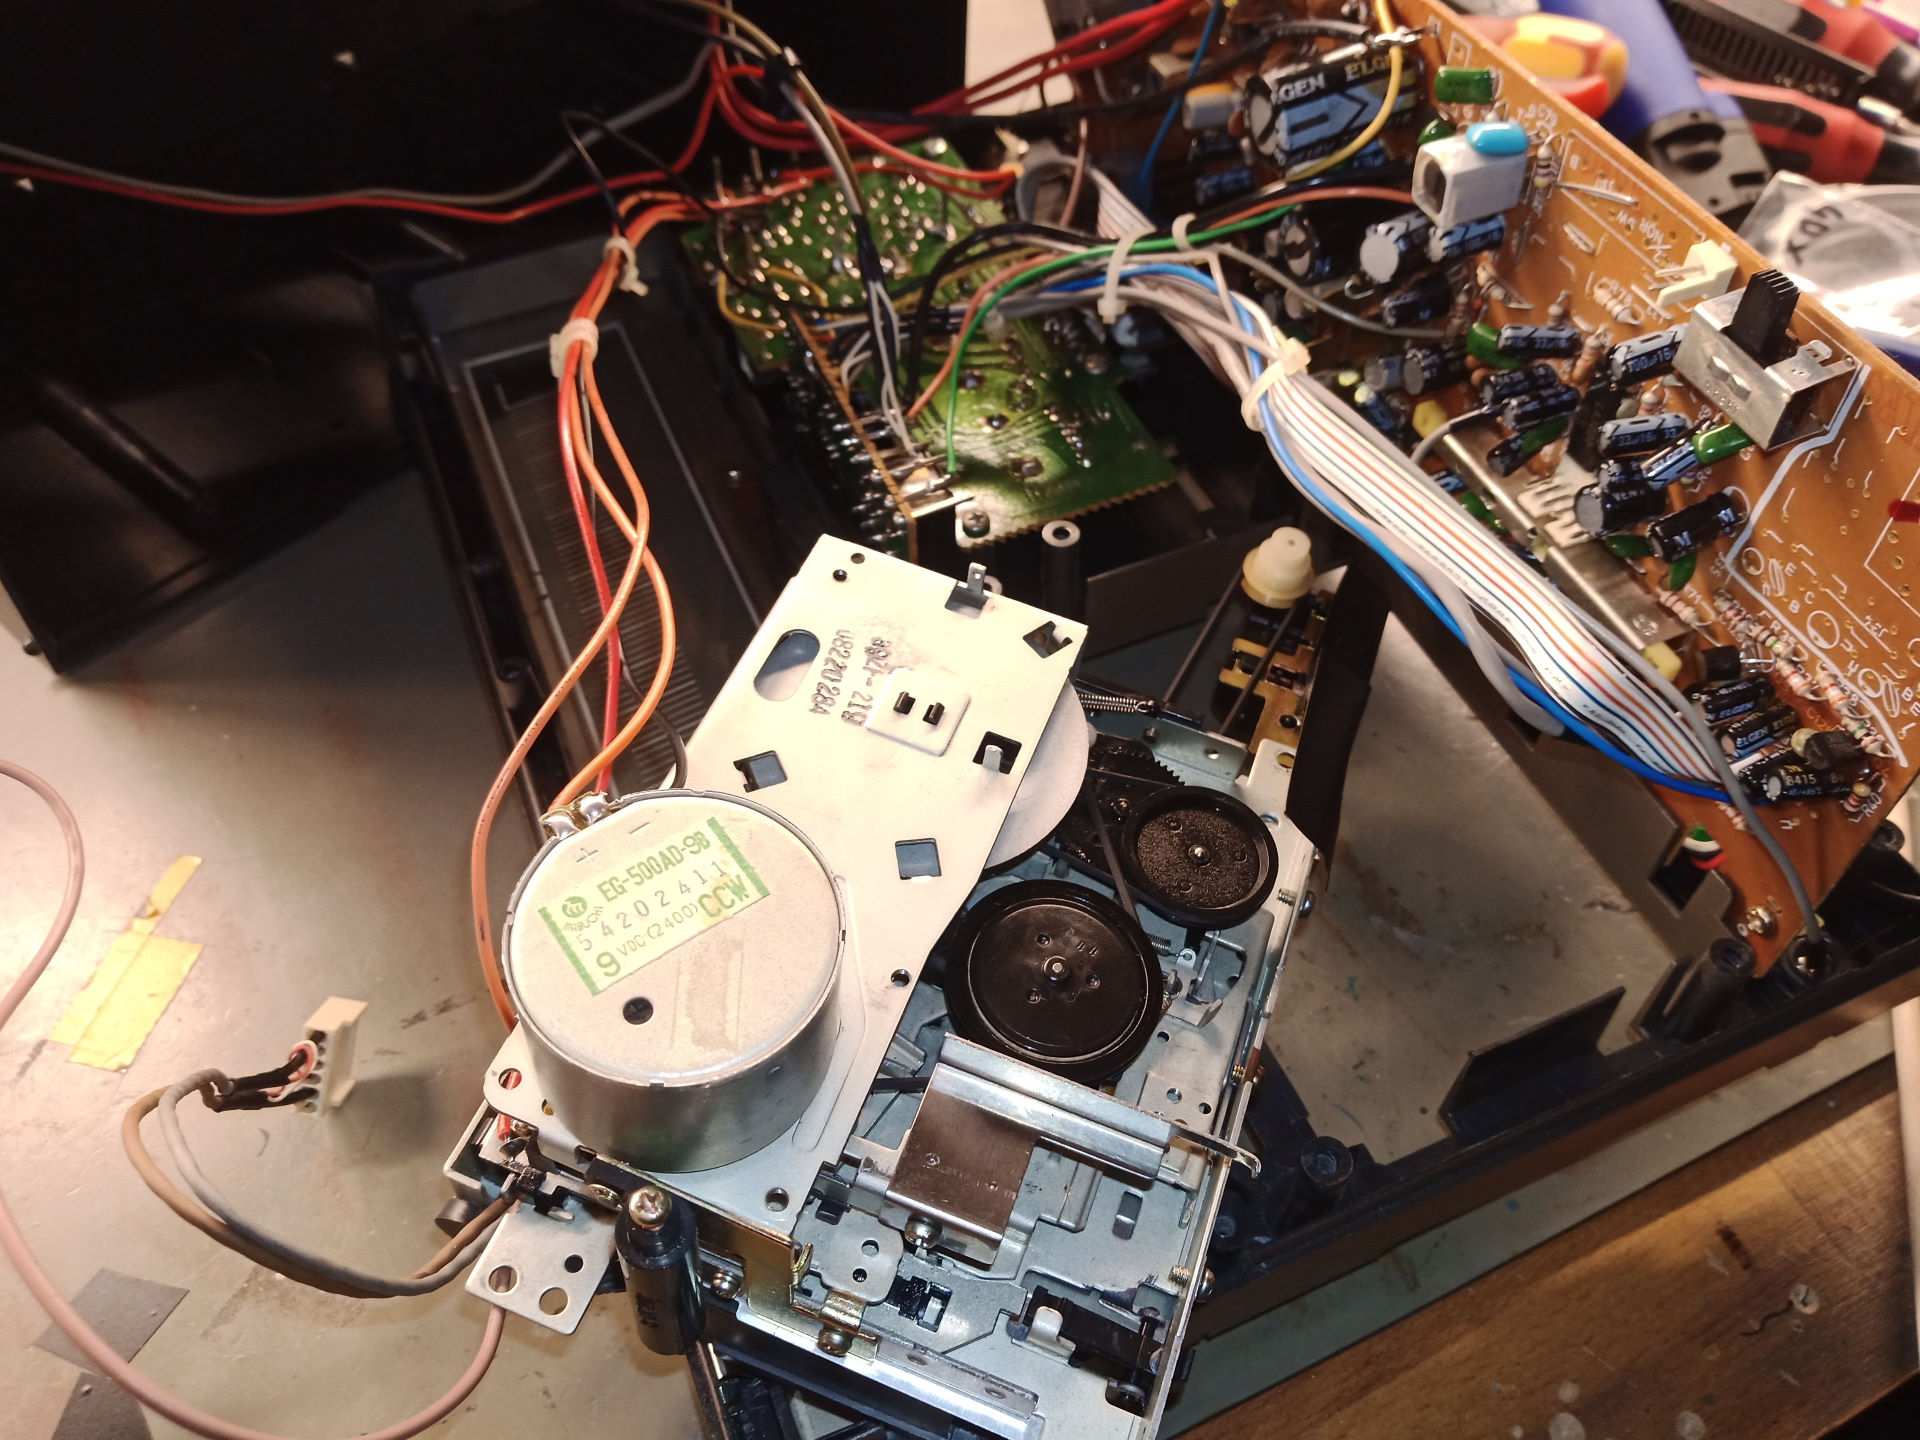
Watch up if there are any washers between the drive and the housing. If so, they have to be placed again later in the same way. - A lot of wobbling and patience is now required to remove the cassette deck. It's not easy, but it is possible:
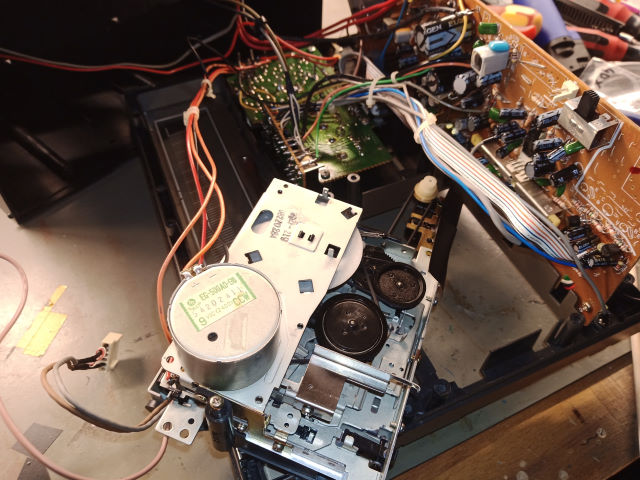
It still is connected to some cables, but now we can easily access everything we need to reach.
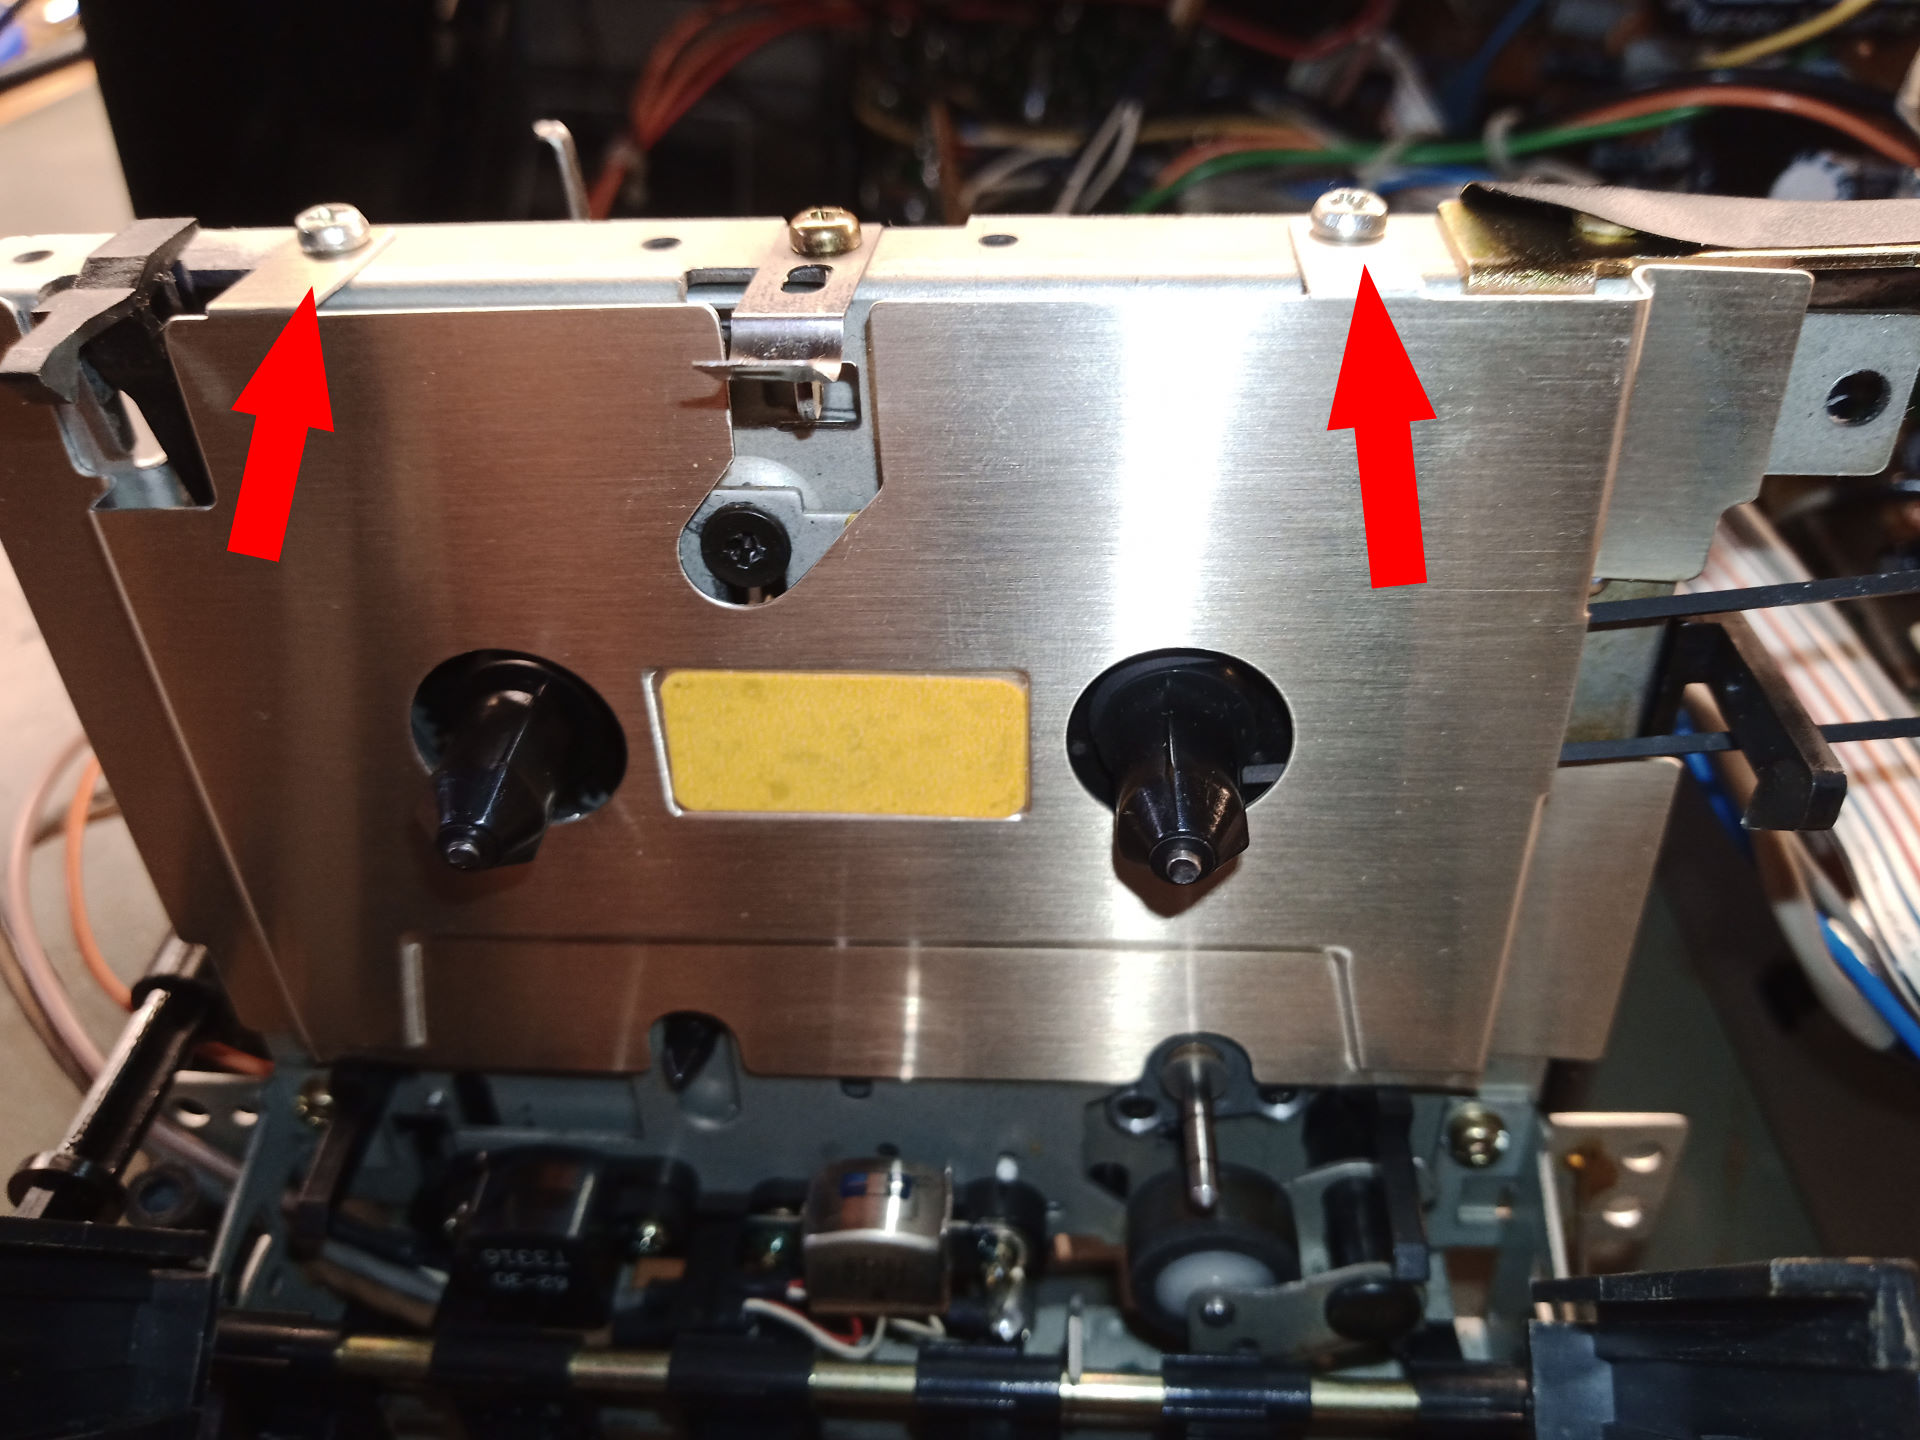
Oh, and spoiler: bringing the cassette drive back to its position will be even more of a fiddling... - Next we remove the steel sheet at the front:

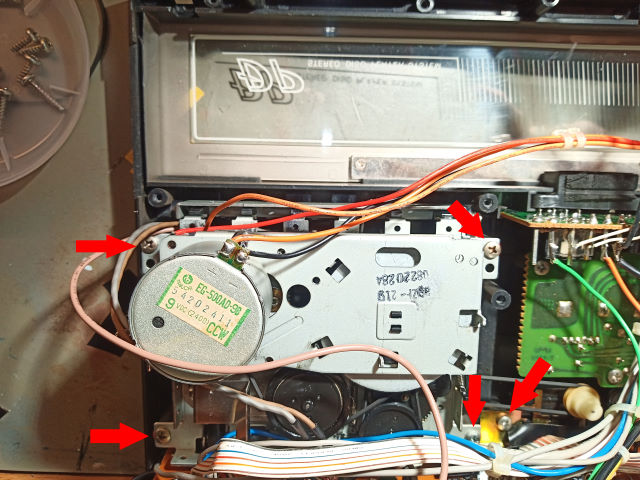
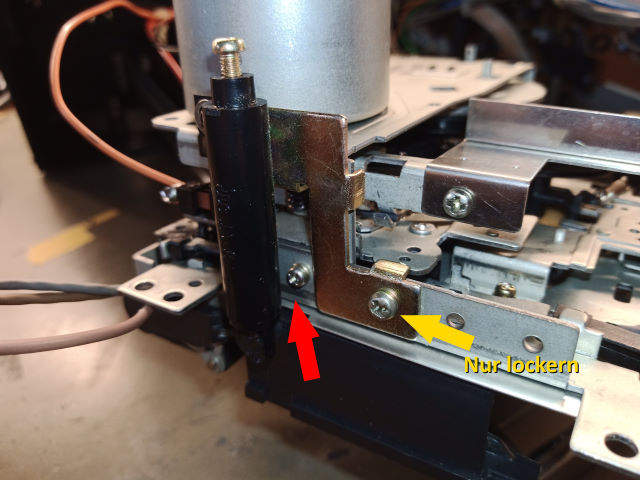
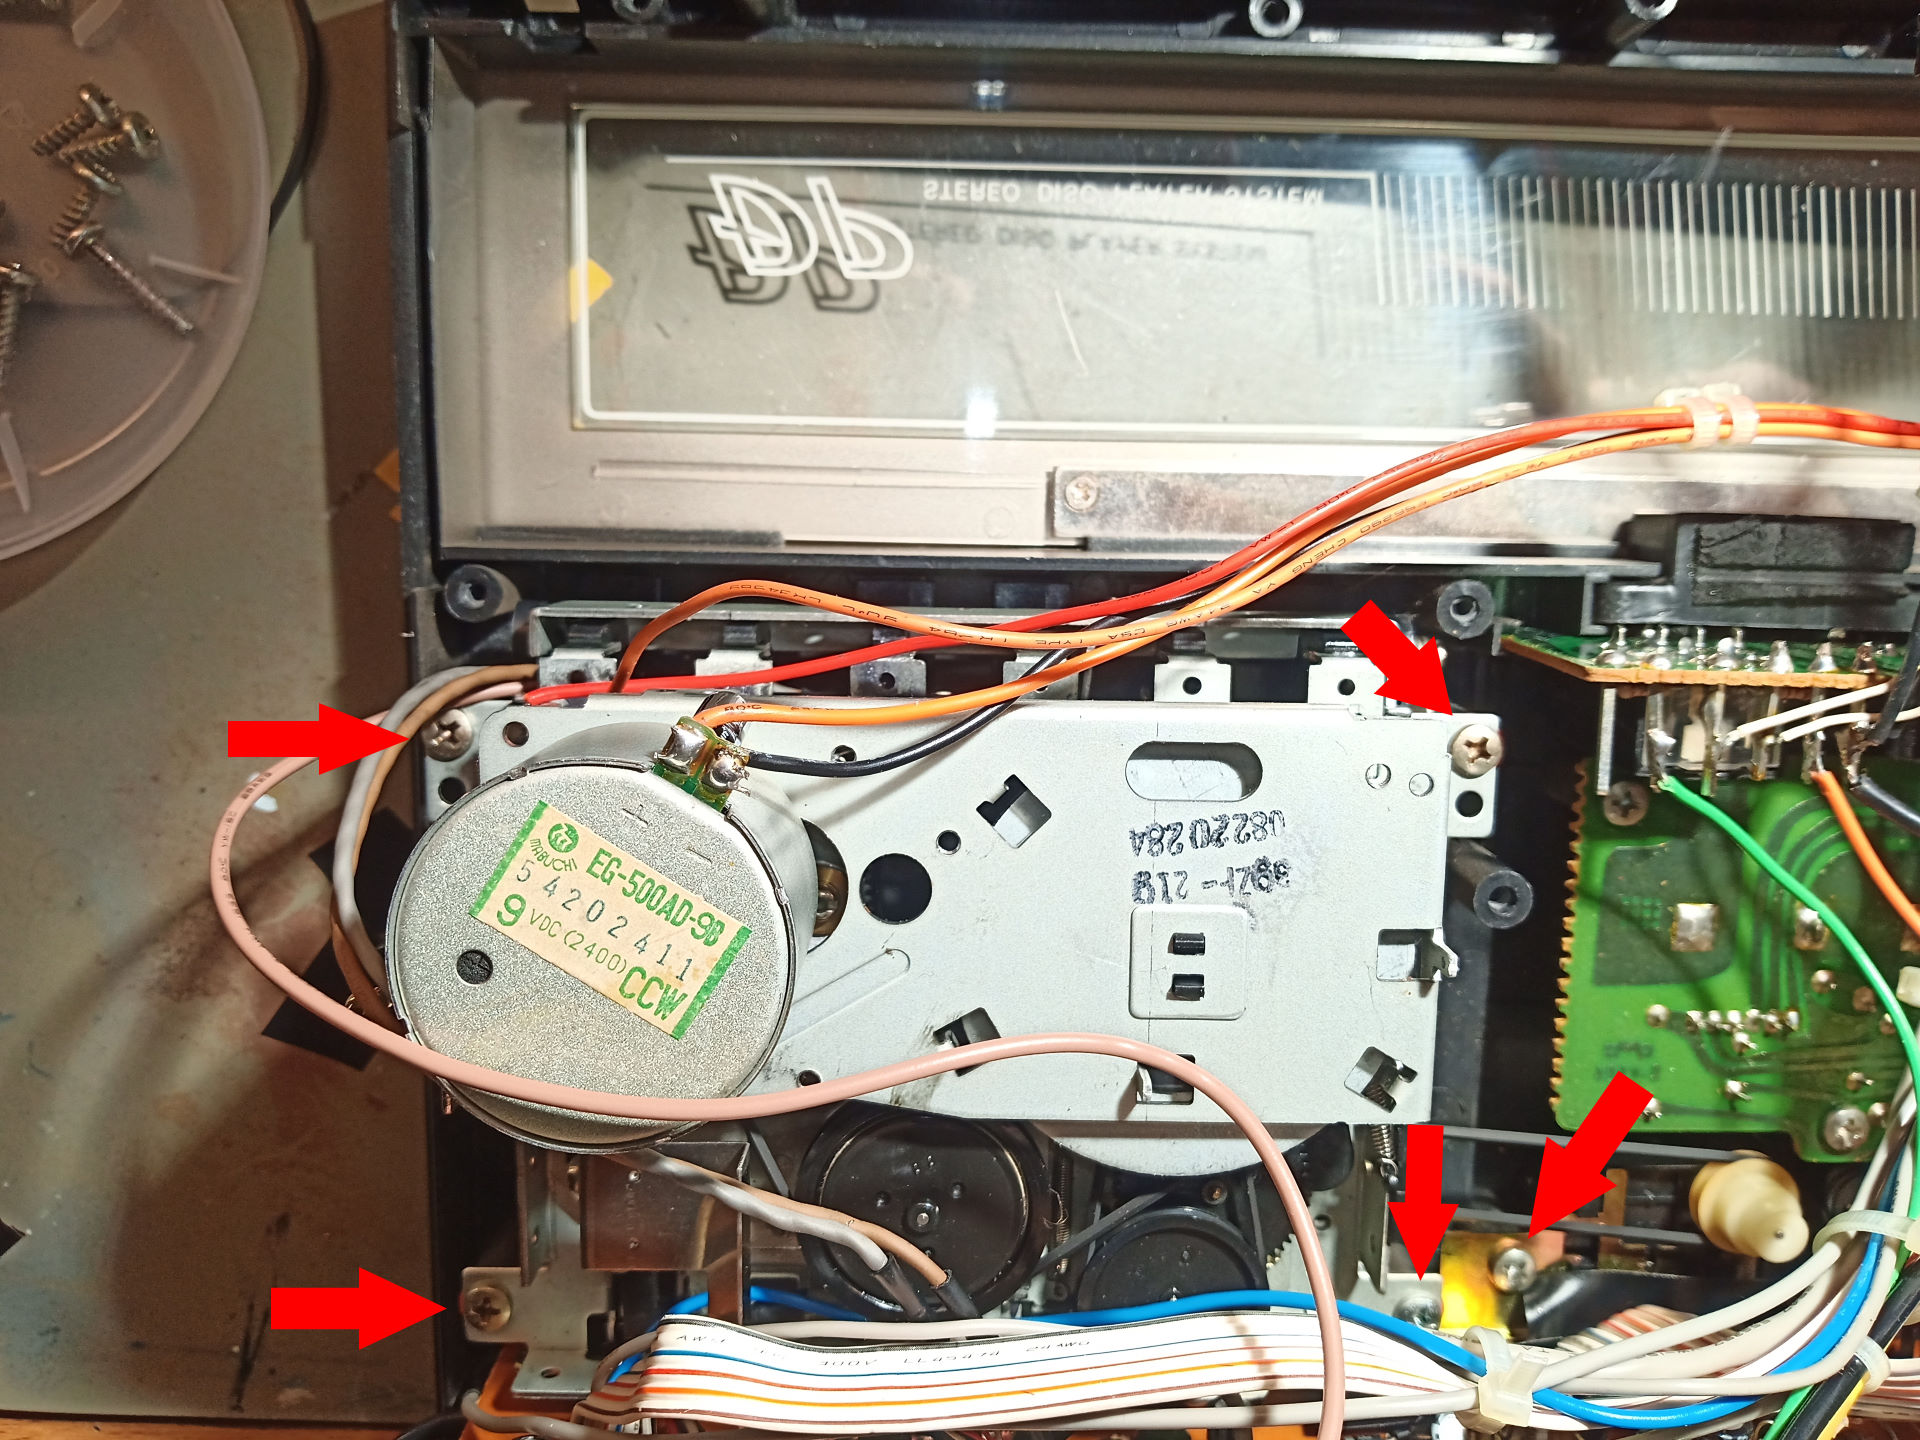
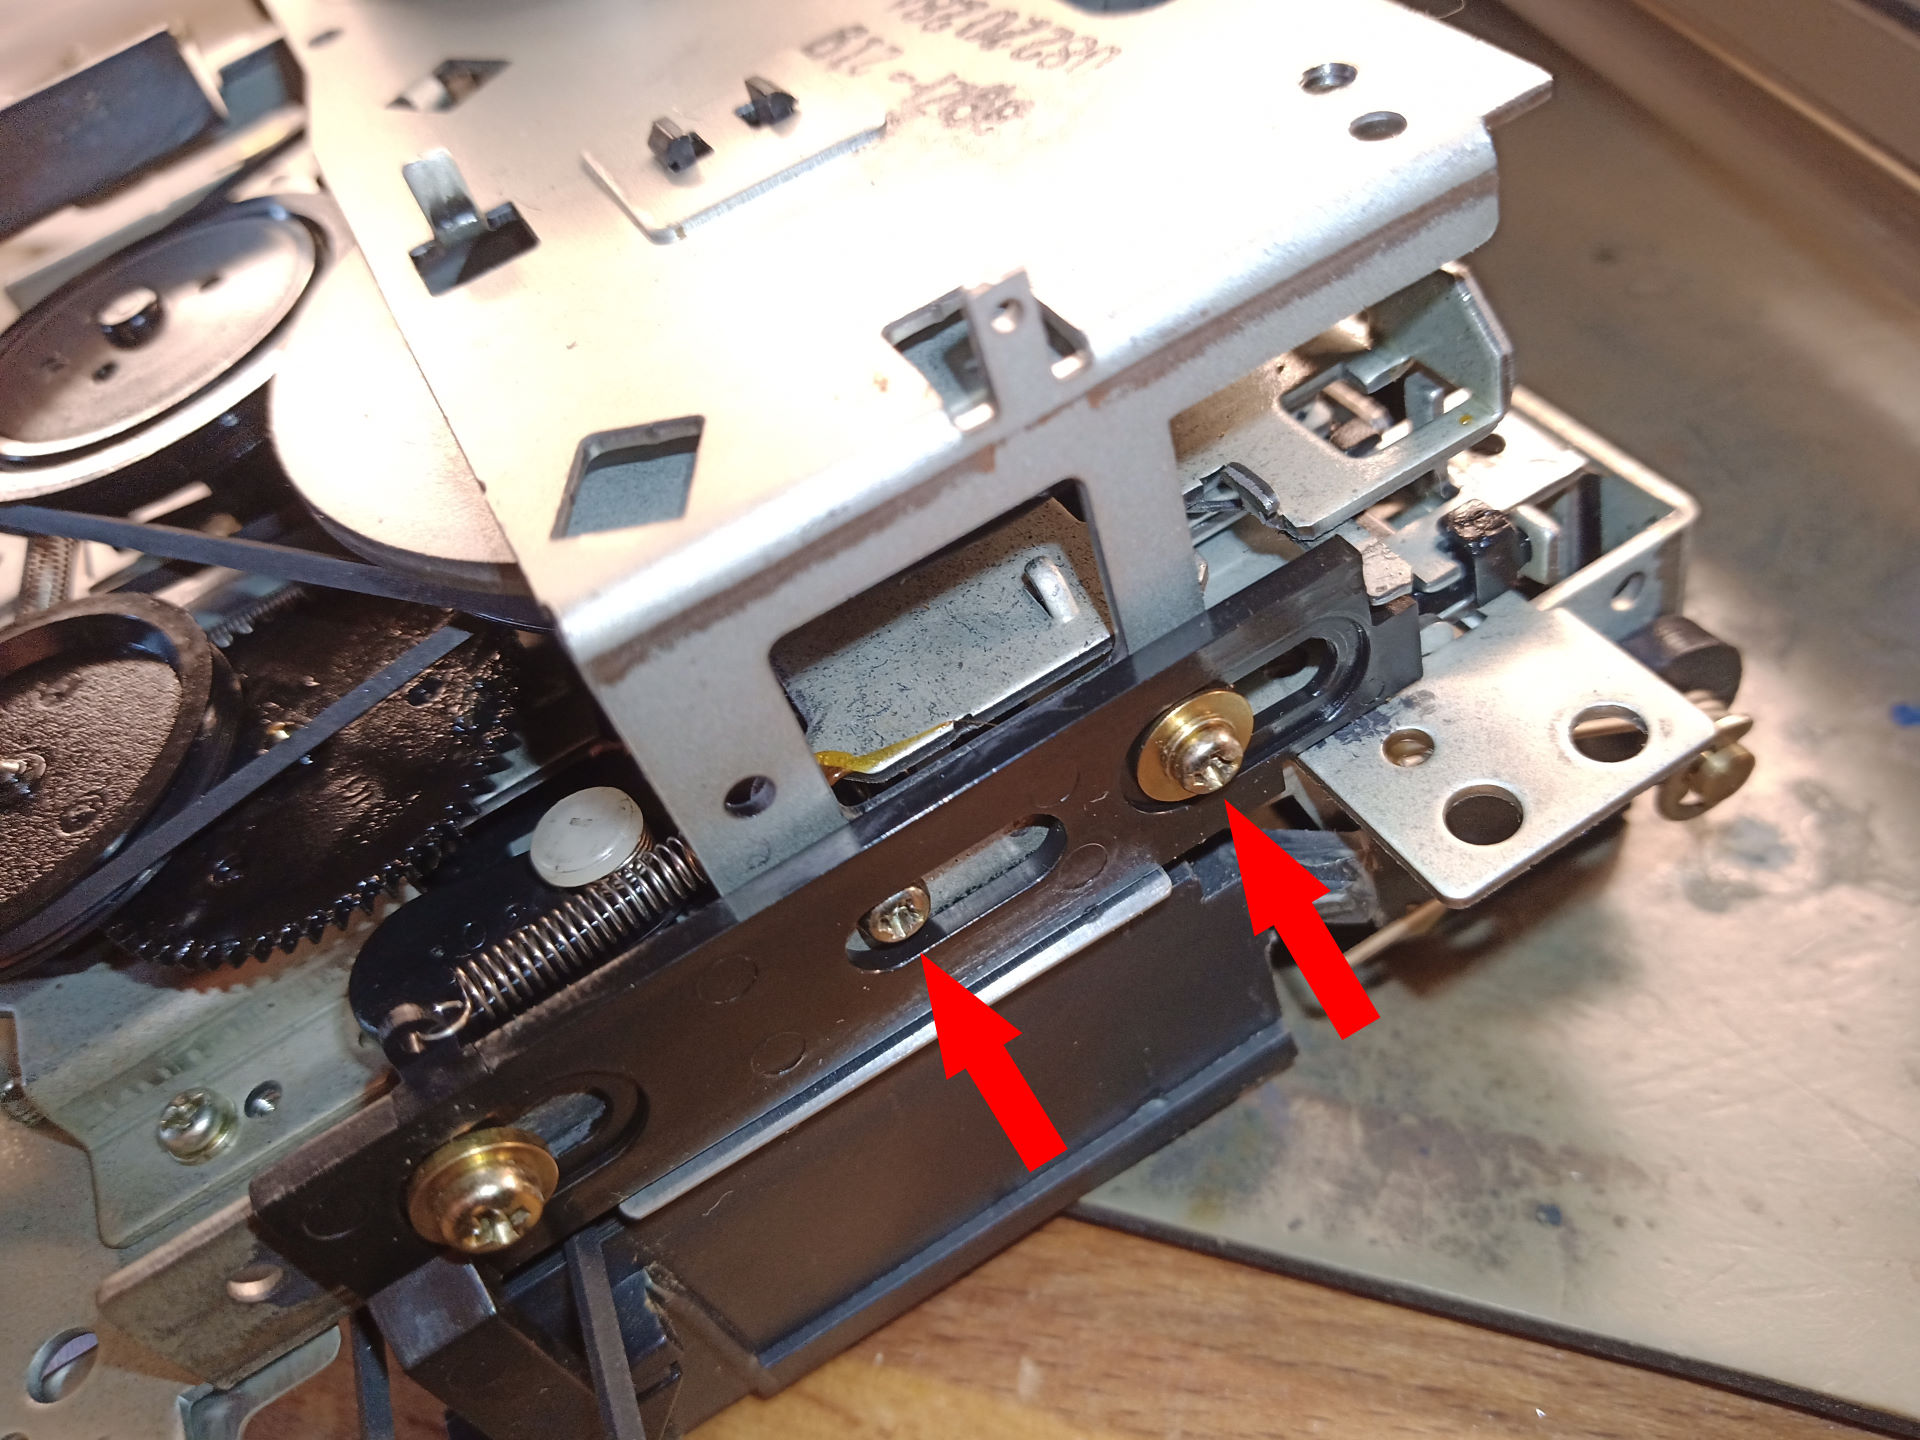
Remove these screws. - Now the motor. Its retaining plate is fastened with screws on the left and right. On one side, only one screw has to be removed (red pointer) and another one (yellow pointer) to be loosened a little:
- On the opposide side these screws are to be removed:


Maintenance
Now, as we fragmented the ghetto blaster quite a bit, it is time for some maintenance.Driving belts
Unfortunately, this device seems to be so rare that no spare parts or at least technical information could be found. To determine the dimensions of the replacement rubbers, I proceeded as follows:- Mark the rubber ring in one place with white Edding marker.
- With the mark on 0, place the rubber on a ruler and unroll the circumference on the ruler without pulling force until the mark comes up again.
The diameter of a circle is the circumference divided by Pi. But since the rubbers are worn out, we have to subtract about 6% to get the original diameter.
For the three rubbers from the cassette deck and the two from the turntable, for me this resulted in:
| Measured length (mm) | Diameter (mm) | Original diameter (mm) | Measured thickness (mm) |
| 185 | 58,9 | 55,4 | 0,9 |
| 223 | 71,0 | 66,7 | 1,4 |
| 136 | 43,3 | 40,7 | 1,0 |
| 300 | 95,5 | 89,8 | 1,4 |
| 141 | 44,9 | 42,2 | 1,0 |
I then ordered square belts with the following dimensions on eBay:
- 55,6 x 1,2 (cassette driver)
- 67,0 x 1,2 (cassette driver)
- 40,0 x 1,0 (cassette driver)
- 90,5 x 1,3 (turntable)
- 43,3 x 1,0 (turntable)
The 43,3mm belt however still seemed to wide in my view. Thus I replaced it with 40mm.
Without knowing the original dimensions, one just has to try out a bit to see what fits best.
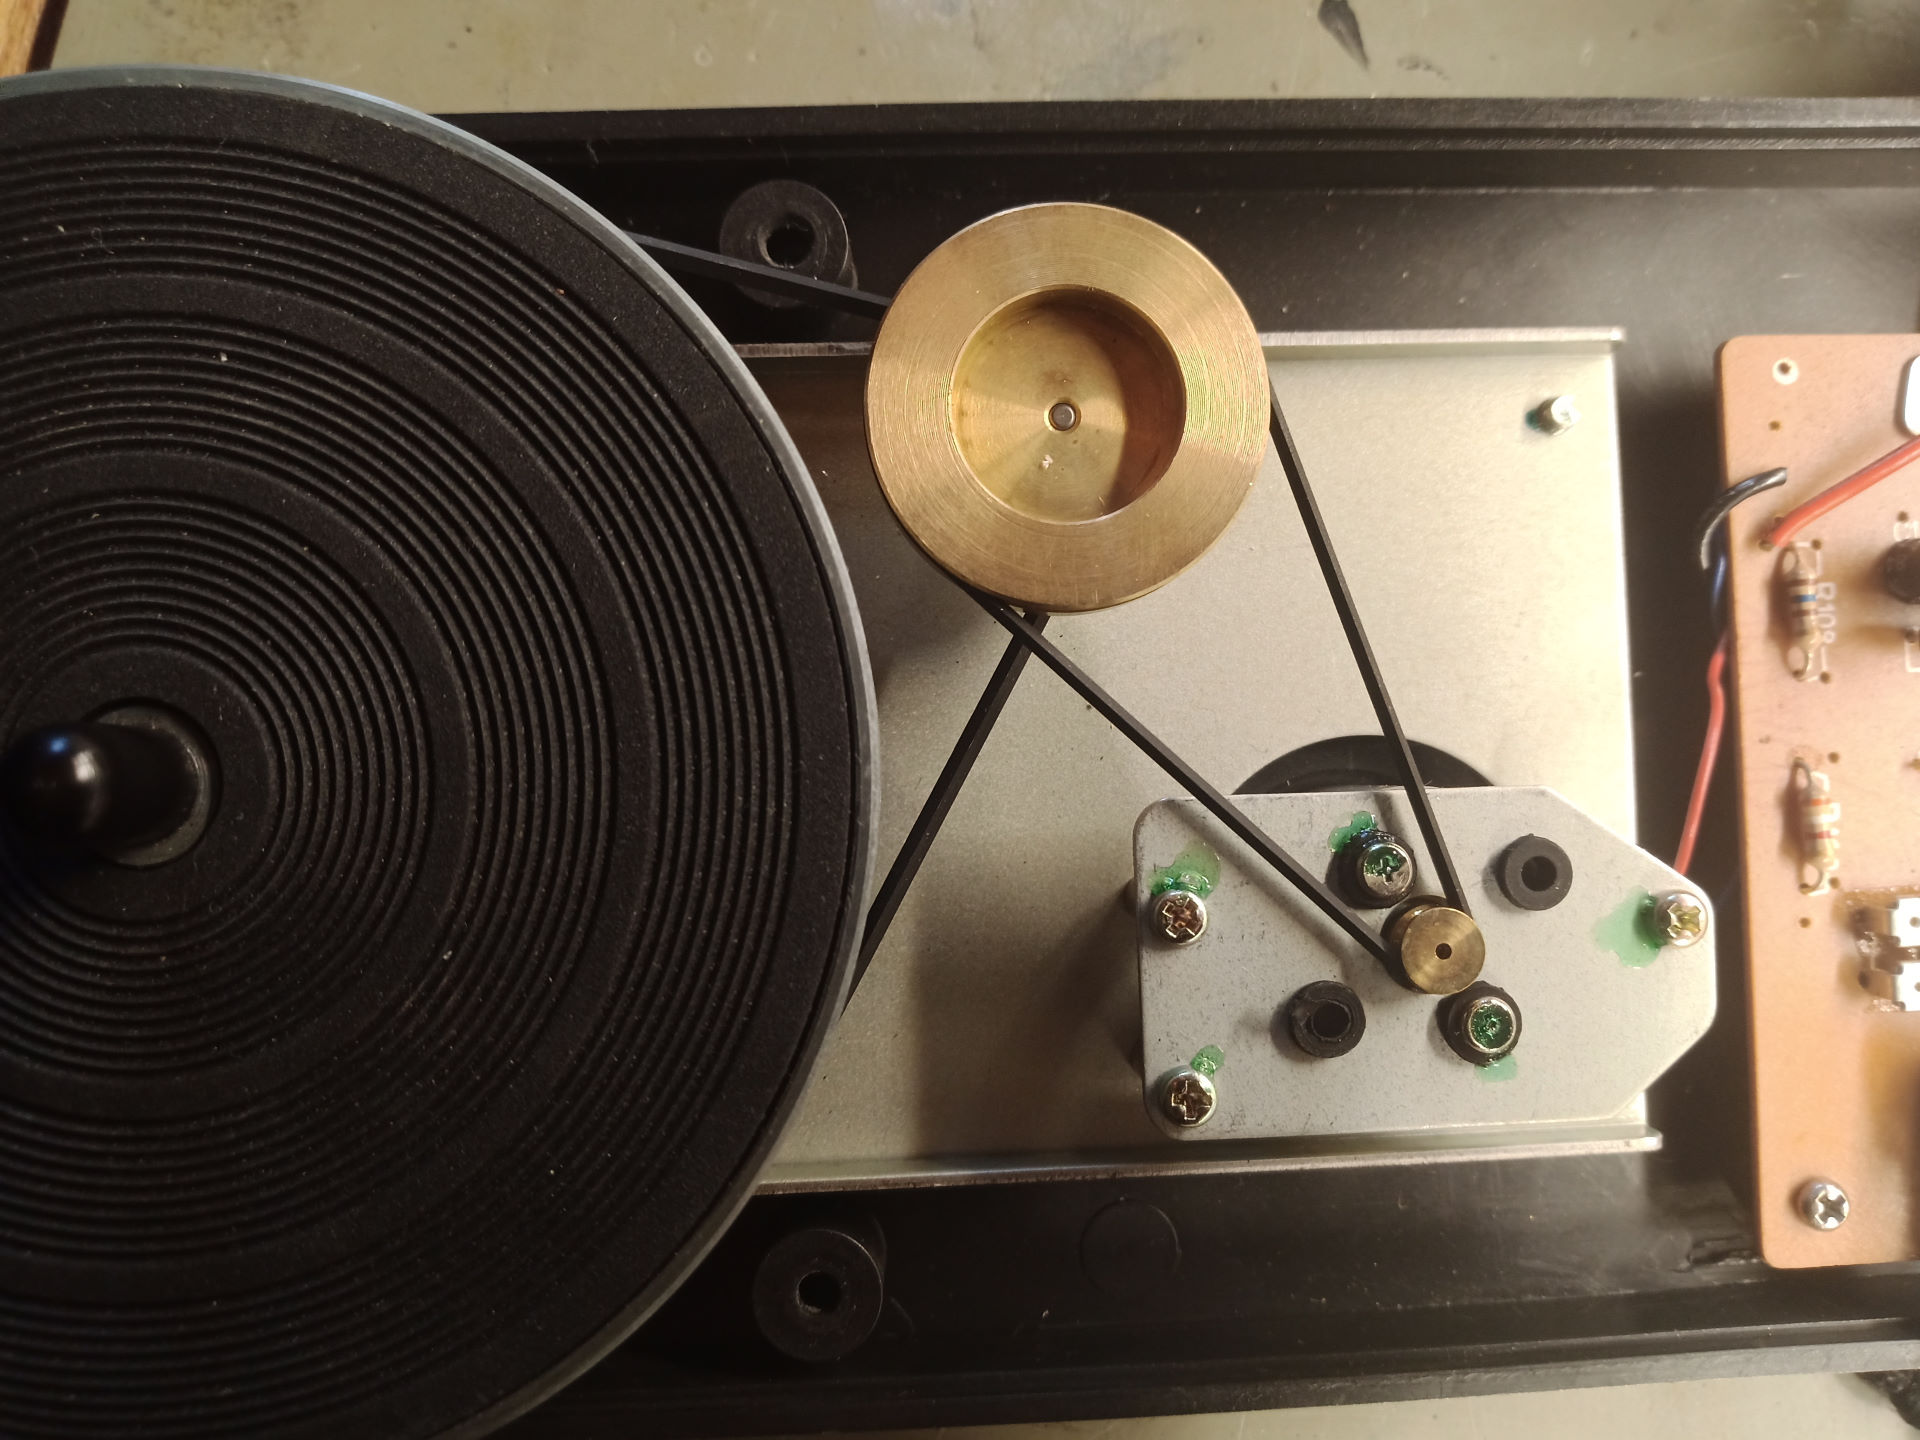
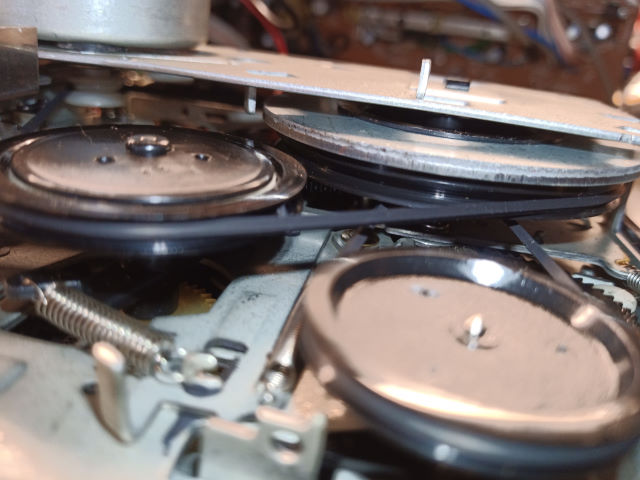
Turntable
Turntable plates are usually driven directly or by flat belts. The STPR 4000 however uses two simple square rubbers to rotate the vinyl. Well, that might just have been a cheap and pragmatic solution at the time.At least they are very easy to change: :
Actually that's all. If you like, you can add a drop of oil to the bearings.
And be aware that any kind of fine mechanics has a keen dust allergy; therefore, you should take the opportunity to remove any dirt from the turntable housing with a Q-tip and brush. Surely, a lot of dirt has accumulated here over the years.
Cassette drive
- In the case of the cassette deck, we will first focus on the counter, which is driven by its own rubber belt:
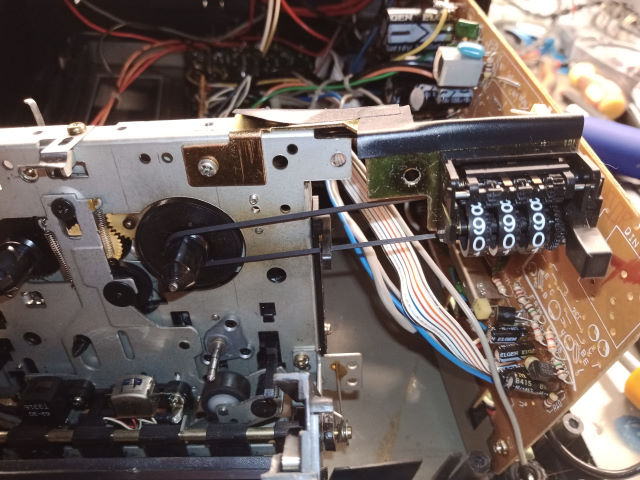
Replace this belt. - Then clean the mechanism on the front with a Q-tip and brush.

Nozice all the dust and fluff? This is how it should not look like. - When reinstalling the sheet, make sure that it snaps correctly in the pins at the bottom:
Steel sheet must snap here. - It is also very important that the rubber belt does not scrape the sheet metal. So pay attention to these gaps:

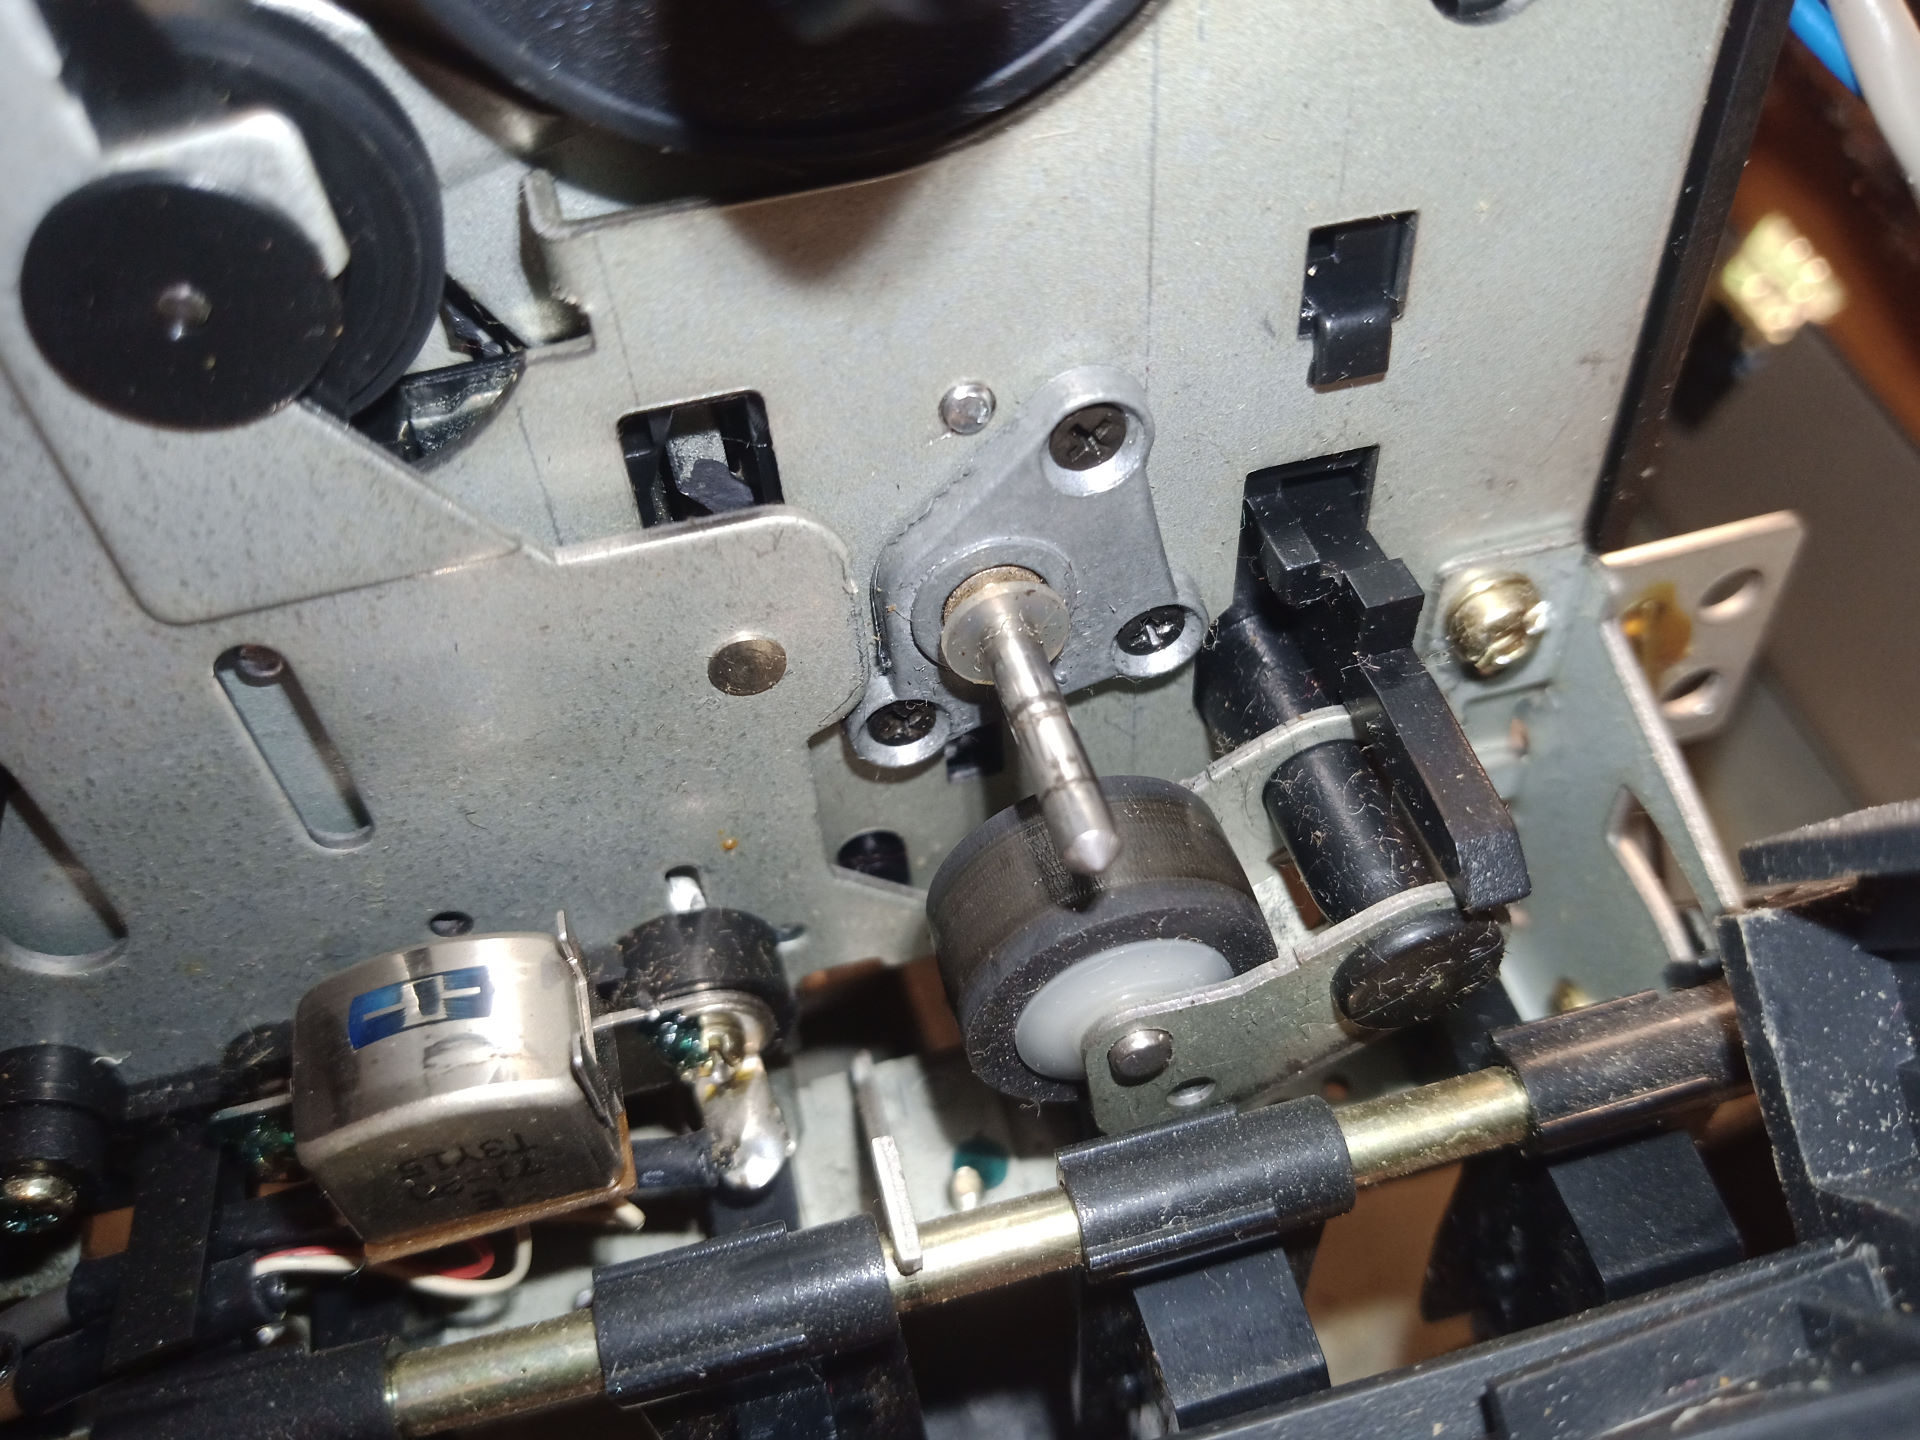
If you have a problem here, bend the brackets at the top of the steel sheet a little to realign it. - Two more belts are located on the back of the drive and will also be replaced. Putting the engine back in is a bit fiddly, but doable.
- The mechanism on the back of the cassette drive would also like to be cleaned with a brush and Q-tip and is happy to get some sewing machine oil on the bearings.


Assembly
Once everything has been cleaned and maintained, the assembly is basically simply done in reversed order.I recommend considering the following:
- Do not overtighten the screws on the bottom of the turntable compartment:
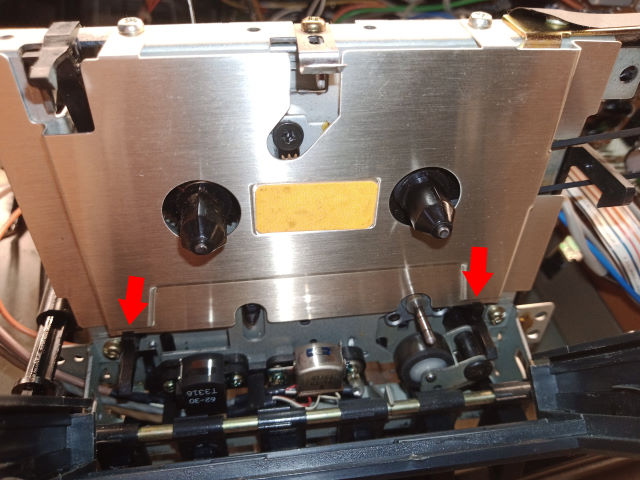
- Also on the cassette deck, the screw marked on the right in the picture must remain loose enough that the black slide can be moved easily:
The mechanism for ejecting the cassette must remain movable. - The drive switch caps tend to fall out like rotten teeth. But a drop of glue on the cap will help:

Apparently, this must be done before the cassette drive is fixed. - Before you screw the housing halves of the ghetto blaster back together, it is advisable to insert batteries and check the function of the turntable and cassette deck.